Say goodbye to rocky soil challenges with just a few tools and my straightforward steps.
I’ll cover everything from small stones that hinder root growth to larger rocks that disrupt almost everything in your yard. So, let’s get started on the path to a smoother, more fertile garden bed that is perfect for whatever you choose to grow.

Tools & Essentials
Here’s a rundown of what you might need:
Hand Tools:
- Landscaping Rake
- Shovel
- Sieve or Screen for sifting
- Gloves
- Wheelbarrow
- Leverage Tools: Board or metal bar
- Homemade Sifter
Machinery:
- Tiller
- Backhoe for larger rocks
The size of your garden and the extent of your rock problem will dictate which tools you’ll need. For most, regular gardening hand tools should do the trick. If you’re dealing with an area that seems like it was once a quarry, it might be time to consider some heavier machinery.
Step 1: Clear Visible Rocks
The first step in de-rocking your soil is to tackle the visible stones on the surface.

You can go about it a few ways:
- Hand-picking: Get down and dirty by grabbing a pair of gloves and picking up those rocks by hand.
- Raking: Use a sturdy rake to pull rocks into piles before removing them. A landscape rake with wide tines is especially handy for this job.
As you clear the surface rocks, keep a wheelbarrow or bucket nearby to toss them into. This will save you from having to pick up the same rock twice.
Step 2: Loosen Soil Thoroughly
Once you’ve dealt with the surface stones, loosen the soil to uncover those sneaky rocks hiding below the surface. You’ll want to make sure you do a thorough job here to catch as many as possible.

- Tilling: If you’re removing rocks from your garden and it doesn’t have any large rocks or boulders, a tiller can break up the soil and help bring smaller stones to the surface.
- Digging: A spade or shovel will be your best friend for areas where machinery isn’t an option or for smaller jobs. Dig in and turn over the soil to expose buried rocks. It’s a bit of a workout, but think of all the toned muscles you’ll have by the end of it!
As you work through this step, take care not to go too deep too fast. Gradually increase the depth of your digging or tilling to make sure you’re not missing any layers of rock-laden soil.
Always keep an eye out for any signs of larger stones before going full steam ahead with machinery. It’ll save your equipment and your back in the long run.
Step 3: Extract Bigger Rocks
After you’ve loosened the soil, it’s time to address the bigger rocks that you’ve come across. These larger stones can be a bit more stubborn, but you’ll get them out with some elbow grease and the right technique.

- Leverage: For rocks that are too big to lift by hand but not quite boulder-size, leverage is your friend. Slide a board or metal bar under the rock and use it as a lever to lift the stone out of its resting place. You might need another rock or a block of wood placed under the bar to give you extra lifting power.
- Digging around: Sometimes, you need to dig around a large rock to loosen it before attempting to move it. This gives you better access and often reveals if the rock is larger underground than it appears on the surface.
- Teamwork: Don’t hesitate to get some help for moving heavier rocks. An extra sets of hands can make all the difference between a strained back and successfully clearing your yard or garden.
Once you’ve managed to free these bigger rocks, roll or carry them away from your area. If they’re particularly heavy, using a wheelbarrow or garden cart can help transport them with less effort.
And hey, if they’re nice-looking stones, why not repurpose them as natural edging for your beds or as features in a rock garden? I’ll cover more about this in step 5.
Step 4: Sift Soil To Remove Small Rocks
Now that the heavy lifting is out of the way let’s focus on the little rocks. These small stones might seem harmless, but they can interfere with root growth and make life tough for your plants.

Here’s how to tackle them:
- Sifting: Grab your sieve or Screen and start sifting! This is where you separate the soil from the stones. Shake that sieve like you’re panning for plant gold, and watch as the fine soil falls through, leaving the small rocks behind.
- Homemade sifters: If you’re feeling crafty or just want to save a few bucks, you can make your own soil sifter using hardware cloth and a simple wooden frame. It’s a straightforward project that adds a personal touch to your gardening toolkit.
- Layered approach: For larger areas, lay out a tarp and shovel small amounts of soil onto it. Use your homemade or store-bought sifter to work through each batch efficiently. It might take some time, but think of it as investing in smoother gardening down the road.
With these steps completed, you should have significantly cleaner soil that’s ready to grow whatever you decide to plant. Your future self—and your plants—will thank you when it’s time to tend to your garden without those rocky interruptions.
But wait, I’ve got two more steps for you to consider.
Step 5: Sort And Repurpose Rocks
Now that you’ve gathered a collection of rocks of all shapes and sizes, it’s time to decide their fate.

Not all rocks need to end up in the “never to be seen again” pile. In fact, with a little creativity, they can find a new purpose in your garden or around your home.
- Landscaping: Larger rocks can become attractive features in your landscaping. Use them to create natural borders for flower beds and pathways or even as standalone decorative elements.
- Drainage: Both medium and small-sized rocks are excellent for improving drainage. Place them at the bottom of planters or raised beds, or use them in areas of your yard where water tends to collect.
- Construction projects: If you’re feeling ambitious, those collected stones could become part of a new patio, walkway, or retaining wall. It’s a rewarding way to integrate natural materials into your outdoor living space.
- Artistic endeavors: Smaller stones make great materials for mosaic projects or as part of a rock painting hobby!
Sorting through your rocks may seem like an extra step, but it’s worth it when you consider the potential benefits and savings.
Step 6: Prepare Soil For Planting
With the rocks out of the way, it’s almost time to welcome new plant life into your garden. But before you start planting, there’s a bit more prep work to ensure your soil is in tip-top shape.

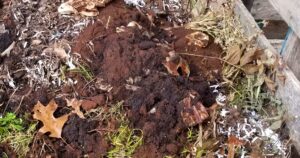
- Amend the soil: After all that digging and sifting, your soil might be a bit rough around the edges. Mix in compost or well-rotted manure to replenish nutrients and improve texture.
- Level the ground: Use a rake or hoe to level out the soil. You’re aiming for an even surface that will provide consistent support for plant roots and ensure proper water distribution throughout your garden.
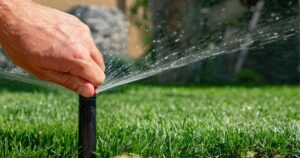
- Watering: Give your prepped soil a good watering before planting. This helps settle everything down and provides a moist environment that’s inviting for new roots. Just don’t turn your garden and yard into a muddy mess. Moderation is key!
- Testing pH levels: If you want to get technical, testing the pH level of your soil can tell you if it’s more on the acidic or alkaline side. Knowing this can help you choose plants that will be happiest in your garden’s unique conditions.
After completing these steps to remove rocks from your soil, pat yourself on the back because you’ve laid the groundwork for a successful growing season, and it’s finally time to plant!